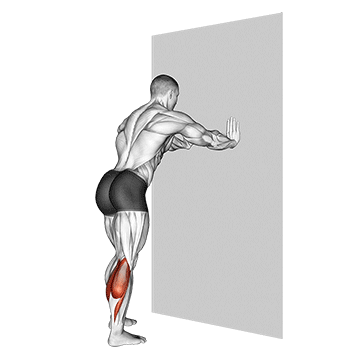
Calf Stretch With Hands Against Wall
beginner stretching exercise · body weight · targets calves
- Body part
- lower legs
- Primary target
- calves
- Equipment
- body weight
- Difficulty
- beginner
The basic calf stretch with hands against wall is the foundational static stretch for the gastrocnemius — and the most accessible entry point to lower-leg mobility work. You face a wall, place your hands against it for support, step one leg back with the heel pressed firmly into the floor, then lean forward through the front knee until you feel a clear pull along the back of the calf. Hold, breathe, switch sides. The mechanics are minimal; the carryover is broad. This variant emphasizes simplicity and accessibility over depth. Where more aggressive calf stretches add forward lean and active push-through (like the calf push stretch with active forward press), the basic version is gentler — appropriate for older adults, trainees with chronic calf issues, or anyone who wants daily maintenance without the deeper intensity. It's also the right starting point for beginners who haven't stretched calves before; jumping straight to deeper variations on chronically tight calves often produces more soreness than benefit. The trade-off versus deeper calf stretches is the lower stretch intensity, which means slower adaptation. But for daily maintenance and as a brief warm-up before lower-body work or running, the simple version covers most needs. Combined with calf strengthening (donkey raises, jumping work) and ankle mobility drills, the basic wall calf stretch contributes meaningfully to overall lower-leg health when practiced consistently. The total time investment — 90 seconds — is laughable compared to the compounding benefits over months and years.
Why train the Calf Stretch With Hands Against Wall?
- Provides an accessible entry point to calf stretching for beginners or older adults.
- Maintains gastrocnemius length without the intensity that deeper variations add.
- Improves ankle dorsiflexion gradually, supporting better squat depth and walking gait.
- Helps prevent calf cramping during running or extended walking by maintaining resting length.
- Costs nothing, requires only a wall, and integrates easily into daily routines (morning, post-workout, before bed).
- Pairs well with ankle circles and calf strengthening for complete lower-leg health programming.
How to do the Calf Stretch With Hands Against Wall: step by step
- 1Stand facing a wall with your feet hip-width apart.
- 2Place your hands against the wall at shoulder height.
- 3Step your right foot back, keeping your heel on the ground and your leg straight.
- 4Bend your left knee and lean forward, keeping your back leg straight and your heel on the ground.
- 5Hold the stretch for 20-30 seconds.
- 6Switch legs and repeat the stretch.
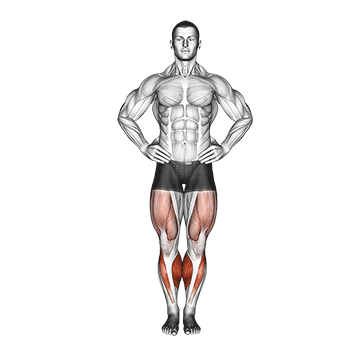
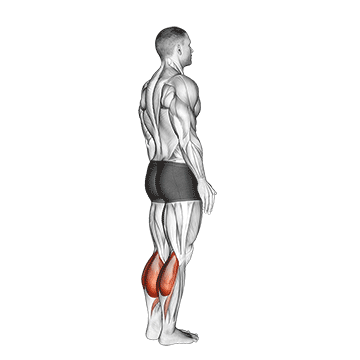
Muscles worked
Primary
calves
Secondary
hamstrings
Common mistakes to avoid
Lifting the back heel during the stretch
If the back heel comes off the floor, you're no longer stretching the calf — you're just leaning into the wall. Press the heel down firmly throughout. If you can't keep it down, step the foot closer to the wall until you can.
Bending the back knee
A bent back knee shifts the stretch from the gastrocnemius to the soleus (the deeper calf muscle). Both stretches are valuable but distinct. For the gastrocnemius emphasis of this exercise, the back knee must stay locked. To target the soleus separately, bend the back knee deliberately as a separate variation.
Bouncing during the hold
Static stretching means staying still. Bouncing (ballistic stretching) triggers the muscle's stretch reflex and actually shortens the muscle. Hold the position without movement, breathe slowly, and let the tissue gradually release.
Holding for only 5-10 seconds
Calves take time to release. A 5-second stretch barely cues the muscle to relax. Hold for at least 30 seconds, ideally 45, and you'll feel the tension noticeably soften about halfway through the hold.
Forgetting one side
Most people have asymmetric calf tightness — usually the dominant leg is tighter. Stretching only one side or doing fewer reps on the tighter side reinforces the imbalance. Always do both sides equally, even if one feels less tight.
Easier and harder variations
Easier
Step the back foot closer to the wall to reduce the stretch intensity. The shorter stride lets you hold the position correctly without struggling to keep the heel down. Build distance over weeks as the calf lengthens.
Harder
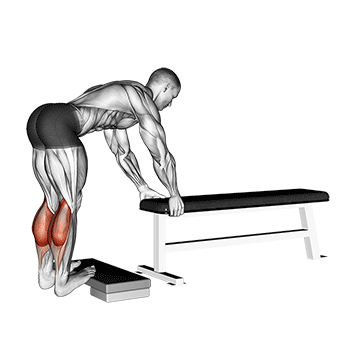
After the basic stretch, add a deliberate forward lean while keeping the heel pressed down — this becomes the calf push stretch variation, which deepens the gastrocnemius emphasis. Or perform from the edge of a step or curb with the heel hanging off the back; gravity adds load to the stretch.
Alternative exercises
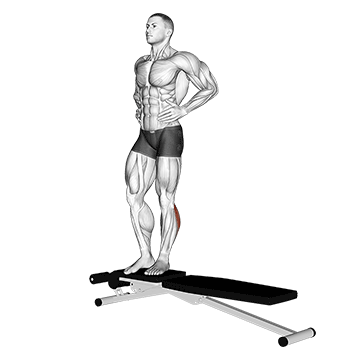
Calf push stretch with hands against wall
Deeper version of the same stretch with active forward push-through. Use this once the basic version stops producing range improvement.
Downward dog
Yoga pose that stretches both calves simultaneously while addressing hamstrings, lats, and shoulders. More efficient if you're already doing yoga.
Step calf stretch
Performed on the edge of a step with the heel hanging off the back. Adds load via gravity for deeper stretch. Good progression from the basic wall version.
How to program the Calf Stretch With Hands Against Wall into your training
Calf stretching works best as a daily habit rather than an occasional effort. The tissue adapts to the position you spend the most time in, so brief daily exposures compound far better than periodic long sessions. Daily routine: 2 sets of 30-45 seconds per leg, performed once or twice a day. A great anchor is right after brushing your teeth in the morning and before bed — both moments are already part of an existing habit, so the stretch attaches easily without willpower cost. Pre-workout warm-up: 1 set of 30 seconds per leg, after light cardio (3-5 minutes of brisk walking) and before any squatting or running work. The warmer tissue stretches further and prepares the calves for loading. Post-run protocol: 2 sets of 60 seconds per leg, performed within 10-15 minutes of finishing a run. The combination of warm tissue and post-exercise muscle activation makes the stretch particularly effective. For beginners: this basic version is the right starting point. Do 2 sets of 30 seconds per leg daily for 2-4 weeks before considering deeper variations. The gradual approach prevents the soreness that aggressive stretching of chronically tight calves often produces. For those with chronic calf tightness: increase to 3-4 sessions per day at 30 seconds each. Combined with calf strengthening and ankle mobility, most people see noticeable improvement in calf comfort and squat depth within 4-6 weeks. Don't program calf stretching as part of a separate 'mobility day' — daily small doses far outperform infrequent long sessions for tissue length.
Recovery and frequency
The basic calf stretch has zero recovery cost. Daily practice is safe and ideal — calf tissue adapts to consistent low-volume input far better than to occasional intense sessions. The main signal to monitor is sharp pain (rather than stretch sensation) at the back of the heel during or after the stretch. This can indicate Achilles tendinopathy, which requires a different approach (loaded eccentric calf raises, not stretching). If the back of the heel hurts rather than the calf belly, see a physiotherapist before continuing. For typical calf tightness, daily practice is safe, recovery is immediate, and benefits compound over weeks.
Frequently asked questions
How long should I hold this calf stretch?
30-45 seconds per side, ideally 2 sets per side. Calves take time to release, and shorter holds (under 20 seconds) don't provide the cumulative stretch input needed for tissue adaptation.
How often should I stretch my calves?
Daily is ideal, especially if you spend long periods sitting or wear shoes with elevated heels. Calf stretching has no recovery cost and adapts to frequency far better than to occasional long sessions.
Calf stretch vs calf push stretch: which is better?
The basic version (this exercise) is gentler and accessible to beginners. The push version adds active forward lean for deeper intensity. Use the basic version for daily maintenance and as a starting point; progress to the push version once your calves have lengthened.
Should I stretch before or after workouts?
Both, with different goals. Before: brief stretches (15-30 seconds) as part of a dynamic warm-up. After: longer stretches (45-60 seconds) when tissue is warm and adaptable. The post-workout stretch is when most adaptation happens.
Will this stretch help my squat?
Often yes. Tight calves limit ankle dorsiflexion, which limits how deep you can squat without compensations like heels lifting. Daily stretching improves dorsiflexion within 4-8 weeks for most people, and squat depth typically follows.
What if I feel the stretch in my hamstrings instead?
You're not bending the front knee enough. The front knee should bend significantly while you lean forward, isolating the stretch to the back-leg calf. If you feel it in the back-leg hamstring, your back knee is bent too — straighten it.
Useful tools for this exercise
Build a workout with the Calf Stretch With Hands Against Wall
Puna gives you guided bodyweight workouts you can do anywhere — no equipment, no gym, just structured progressions that build real strength.